webpack 搭建
打包环境
node 14.15.0
npm 6.14.8
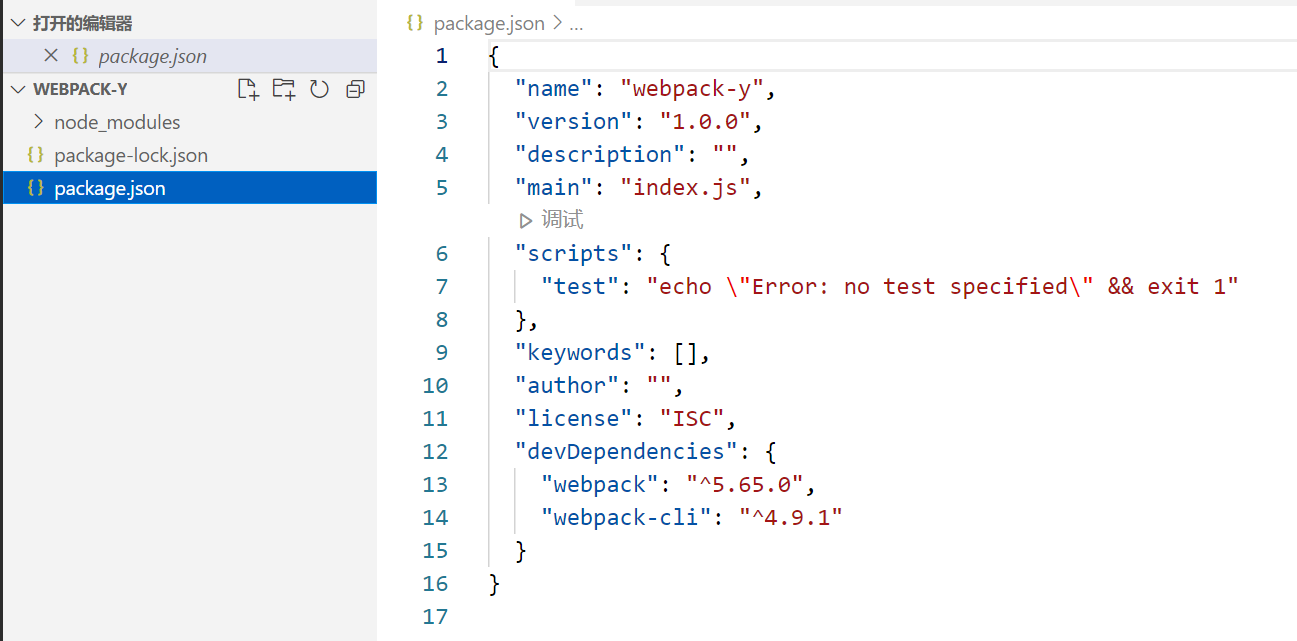
"webpack": "^5.65.0",
"webpack-cli": "^4.9.1"
初始化 package.json
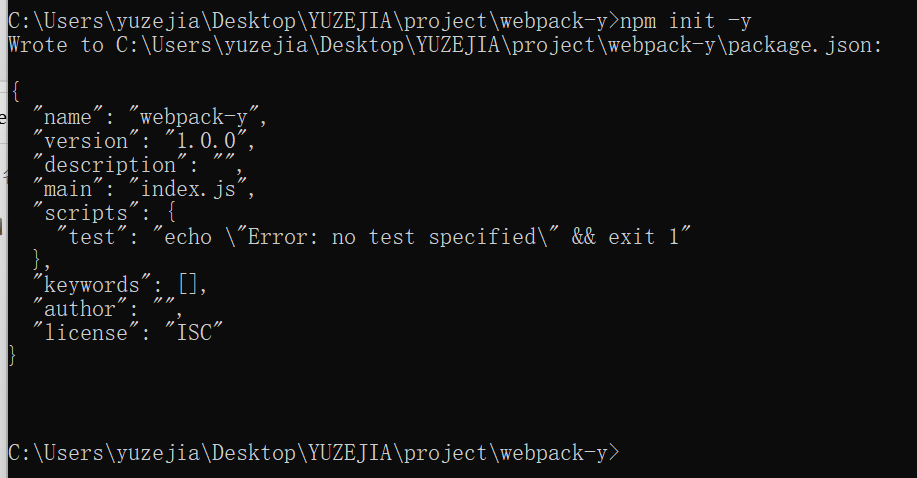
新建文件夹 webpack-y
cd webpack-y
npm init -y
安装 webpack 依赖
npm install webpack webpack-cli --save-dev

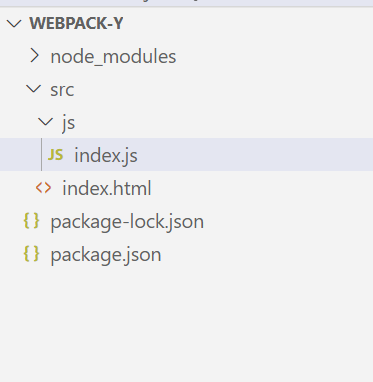
webpack-y 目录
打包 js 文件
修改了目录结构
- 我们新建 src 目录,同时在 src 目录下新建 index.html 文件
- 然后在 src 中新建 js 目录同时新建 index.js
目录结构
修改 index.js 内容
const init  = ()=> {
    console.log(' webpack init ----');
}

init()
webpack.config.js 配置
新建 webpack.config.js 配置文件 配置一下内容 (稍后详细说明)
const path = require('path');
const HtmlWebpackPlugin = require('html-webpack-plugin');
module.exports = {
/**
* 打包模式,不配置会警告,但底层还是会去配置默认的,就是production
* production: 压缩模式,被压缩的代码
* development: 开发模式,不压缩的代码
*
*/
mode: 'development',
entry: './src/js/index.js', // 入口文件 要打包的文件
output: {
filename: 'main.js', // 打包后的文件名
path: path.resolve(__dirname, 'dist') // 输出目录
},
plugins: [
// 打包html 模板
new HtmlWebpackPlugin({
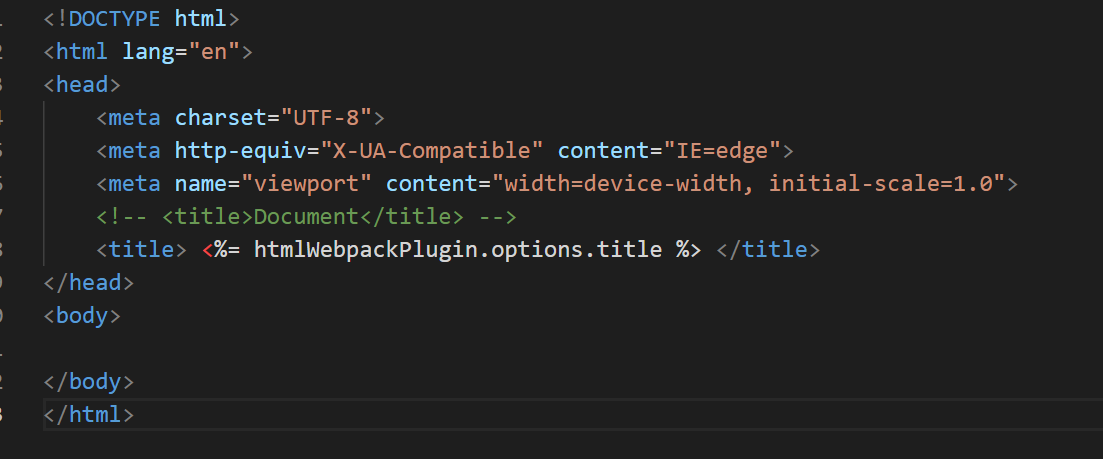
/* 打包时 html 的 title (注意:仅设置这里输出的html 并不会发生改变,
*需要在html 模板中 使用 <title> <%= htmlWebpackPlugin.options.title %> </title>)
*/
title:'webpack 打包',
filename: 'index.html', // 输出文件
template: './src/index.html' // 源模板文件
})
],
}
修改 package.js 文件中的 script 增加
  "scripts": {
    "test": "echo \"Error: no test specified\" && exit 1",
    "build": "webpack"  // 新增 打包命令
  },
执行打包命令
在命令行输入 npm run build
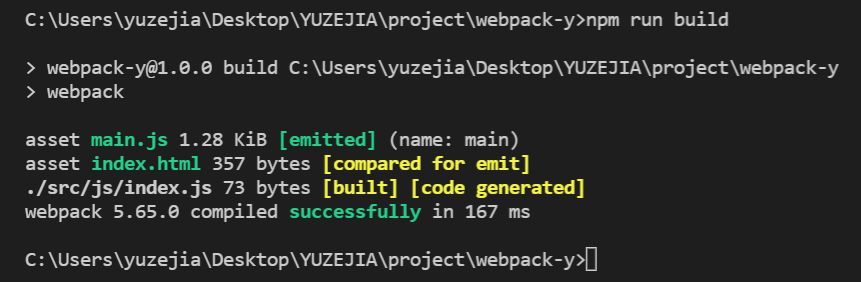
webpack 已经把文件给打包完了 我们去 dist 目录看下

这时候我们通过浏览器运行 index.html。在控制台就能看到 index.js 中的输出
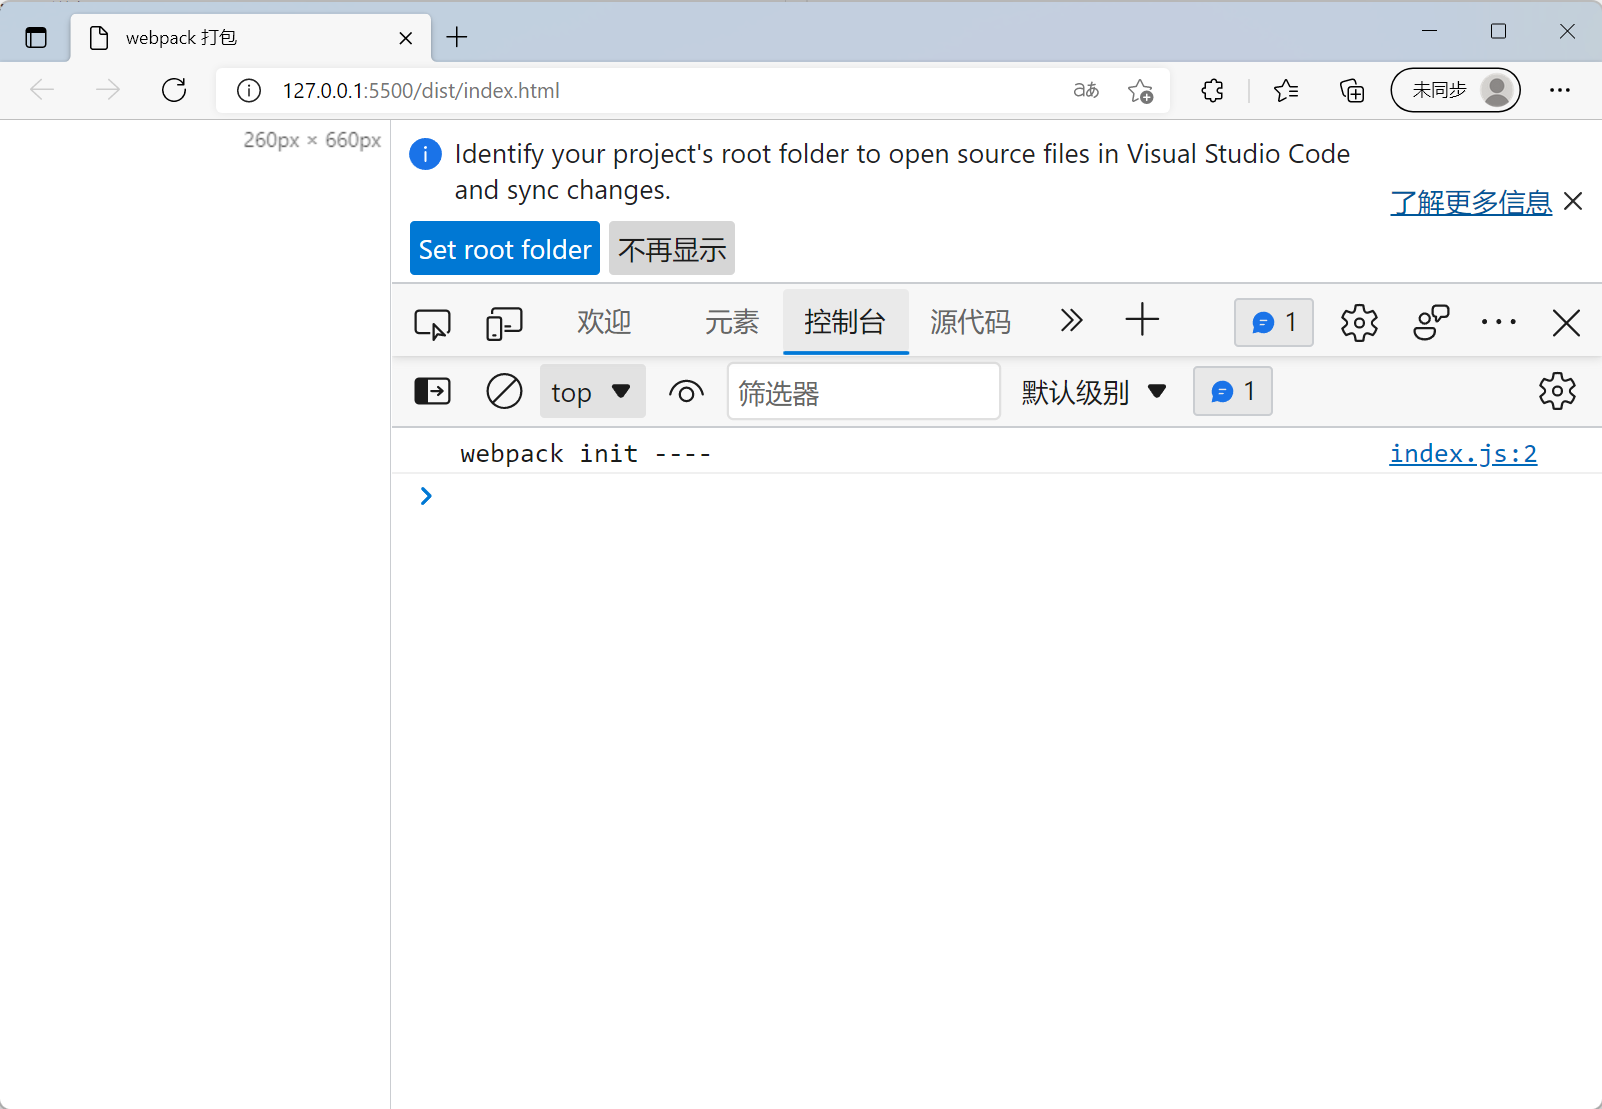
最基本的 js 打包已经实现了~
注意的事项:
1 mode 如果没有配置,打包的时候会出现警告

2 HtmlWebpackPlugin 中 title 属性。配置的时候 需要在引用的模板中 设置:
ok~